What Is a Transformation
A Transformation is an entity that enables data to be modified. It can be thought of as a mathematical function that takes in input data (e.g. produced by a connector) and outputs results (i.e. output data). Multiple transformations can be applied either globally to a canopy, and/or locally to specific connectors in a canopy. Transformations are processed sequentially, one after another, according to the order defined by you. A transformation consists of one or more actions.What Is an Action
An action (or transformation action) is a subunit of transformations. It represents a single type of transformation operation to be applied to input data. Actions are applied sequentially in the order defined by you. For further information on specific action types, refer to ActionTypes.Action Types
- Shift
- Concat
- Coalesce
- Delete
- Extract
- Default
- Base64 Encode
Shift
A shift action moves a specified field and its value to the destination field and its value, and then deletes the original field.Configurable Fields
key: Field you want to be set tovalueField you have
over which can then be each inside of an array.
Note: most transformations will be using shift and make sure to use the over field for objects in an array.Using Transformations
Creating Transformations
New transformations can be created to be attached to your canopies and/or connectors. Transformations are shared within your organization. Under your organizations projects in the left side bar, click on the ”+ Create New” button and select “Transformation” from the dropdown menu.Transformation Builder
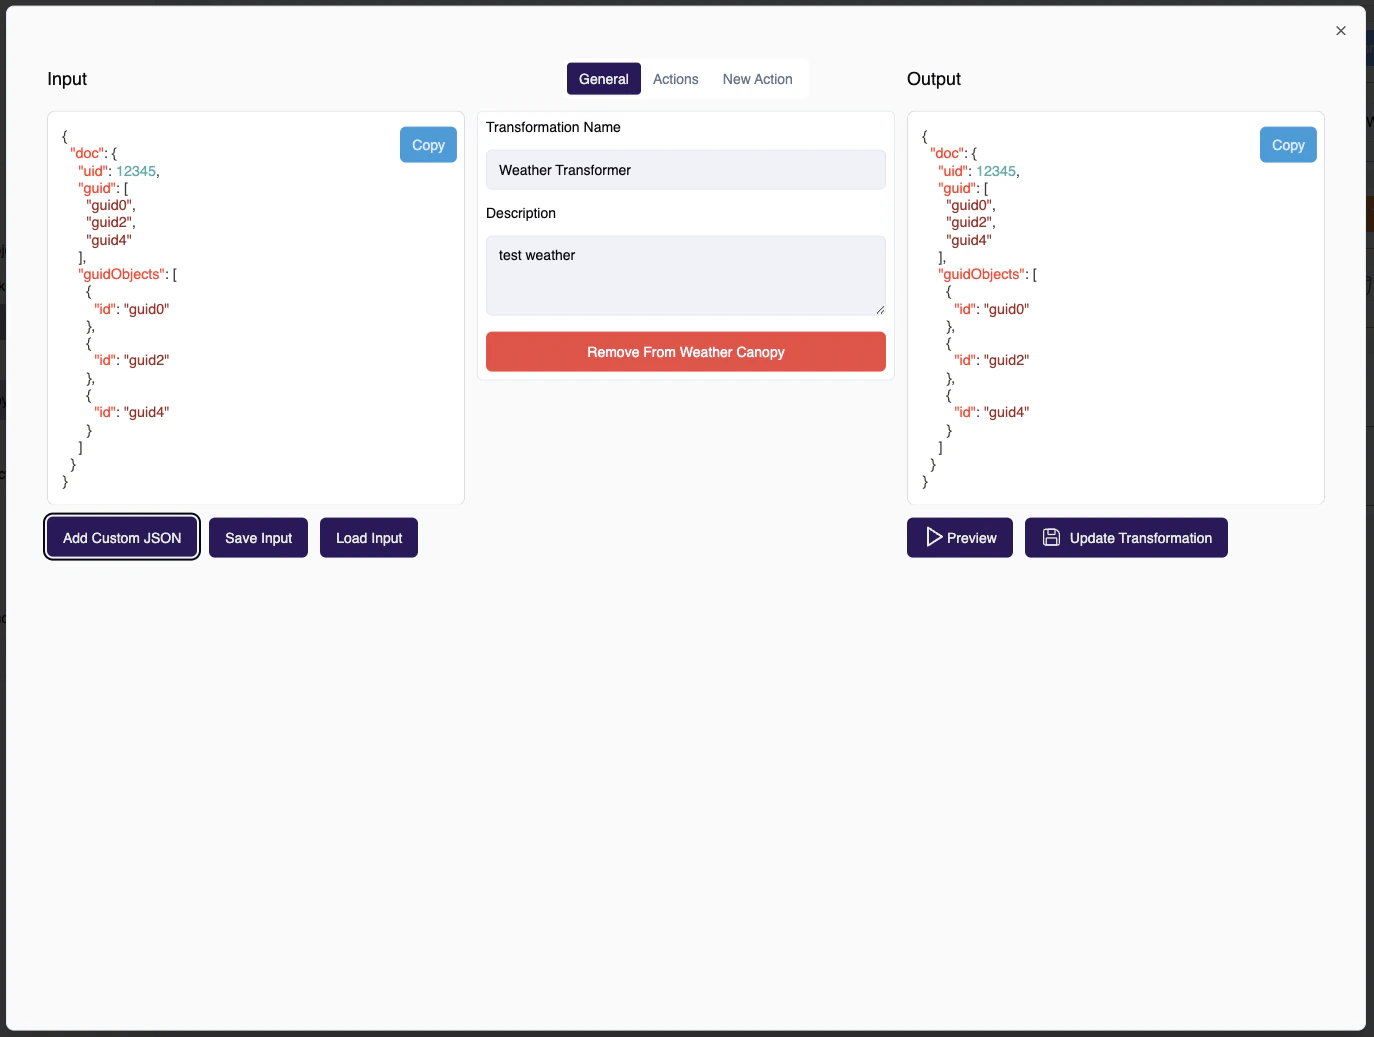
Once you create a transformation, you will be be redirected to the Transformation Builder page. The transformation builder will give you ability to insert your custom JSON and apply actions from the center column. See guide below: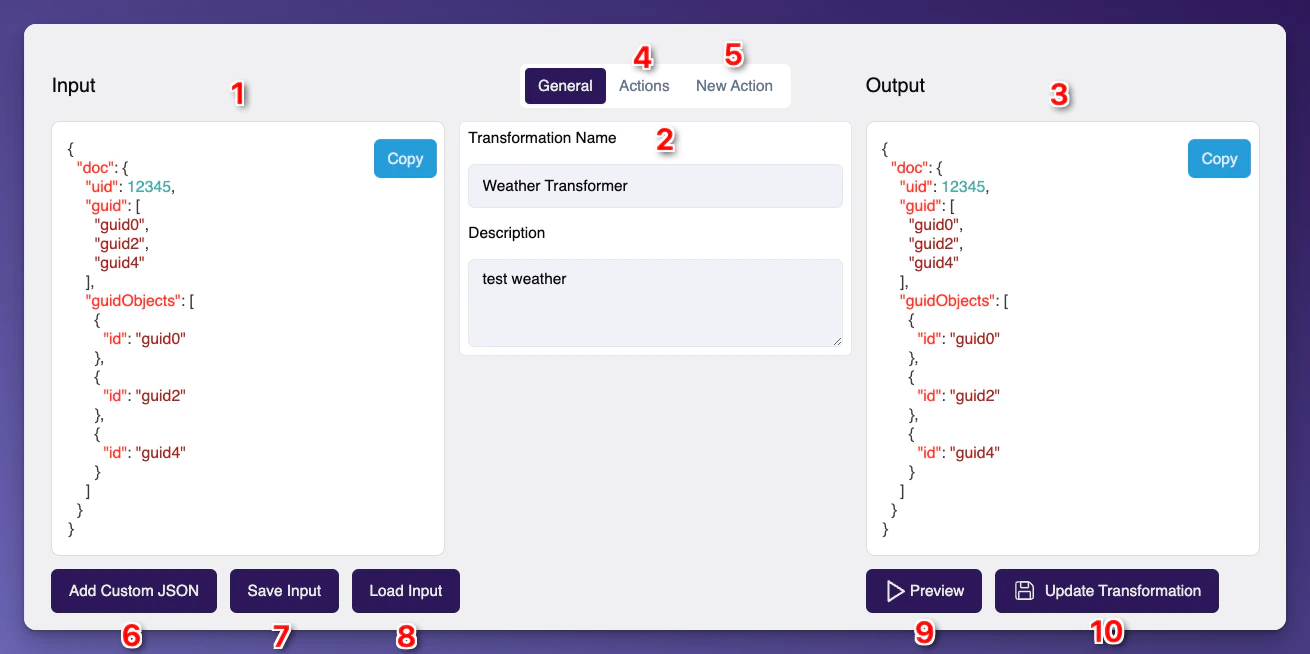
Input - This is the input JSON, this should represent the base data payload that you want to transform.2 - Transformation Info - This is the overview of the transformation info, here you can update the name and description.3 - Transformation Output - This it the transformation output preview, this is the final result after the actions have been applied.4 - Actions Tab - Link to the actions tab pane. Here you can view, edit, and set the order of the actions.5 - New Action Tab - this tab is where you can configure new actions as well as use the AI action generator to speed up the proccess.6 - Add Custom Json - this is where you can view, edit, and set the order of the actions.7 - Save Input - save any custom JSON inputs so that way if you need to edit the transformation you can load a previous input.8 - Load Input - here you can load an input that you have already configured and saved.9 - Preview Input - Anytime you want to see the result of the changes you have made to the transformation actions you can preview the transformed result.10 - Updated Transformation - Apply all the changes you have made to the transformation.Add Actions
Starting by choosing the actionType. Then, configure each action by defining one or more Search criteria (By Name, Wildcard, Double Wildcard). Depending on the action type, configure additional criteria listed.By Name
identify a field (to apply action) by literal field nameWildcard
identify all fields in the current depth level of JSON inputDouble Wildcard
identify all fields in the current and all sub depth levels of JSON inputUse Preview to Confirm Desired Action Behavior
The transformation builder provides anInput and Preview window. Enter a valid JSON snippet into the Input window and review the Preview window to confirm successful transformation results. Each action produces its own Preview window. You can scroll down the Preview window to confirm each action being applied to the Input JSON snippet.Create Transformation
Once all configurations are set, be sure to click on the greenSave Transformation button bottom right corner.Modifying Transformations
The process to modify a transformation is identical to creating a new transformation. The one difference is selecting an existing transformation. Please note that modifying a transformation that is already attached to canopies or connectors will have immediate effect on the canopies and/or connectors.Attaching Transformations
You can attach transformations you or your organization members created to canopies and connectors through the canopy page. You can also attach identical transformations to different connectors or canopies.Attach Transformations To A Canopy
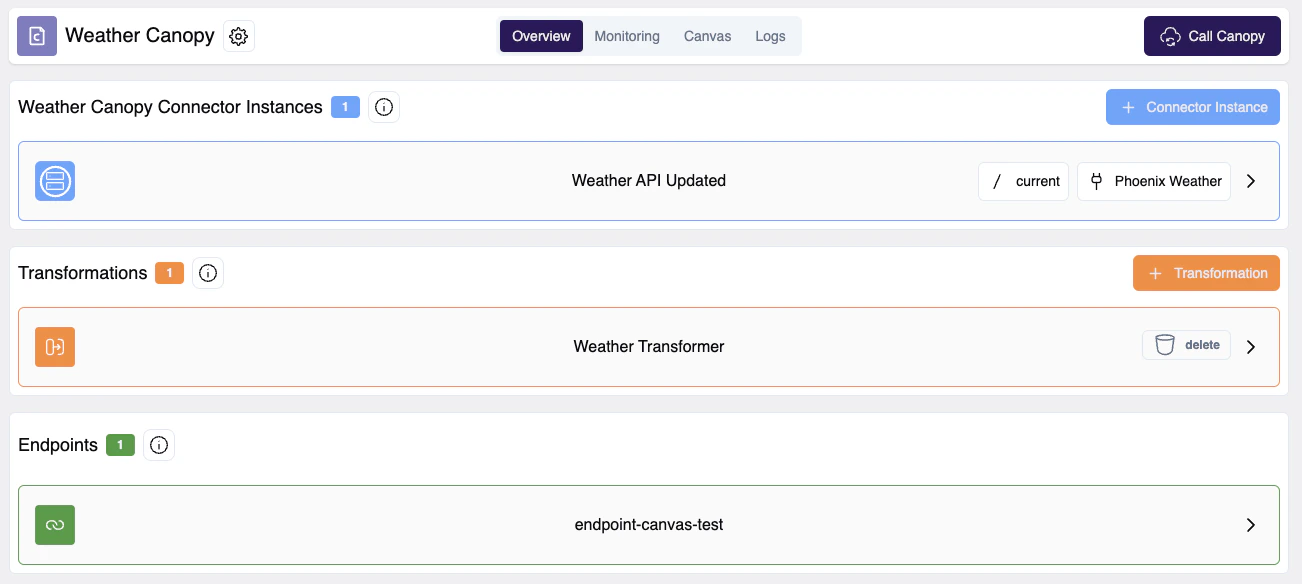
To attach a transformation to a Canopy, first navigate to your desired Canopy. If there are no transformations you will see an empty transformation state indicated by dotted lines around the Transformation slots.
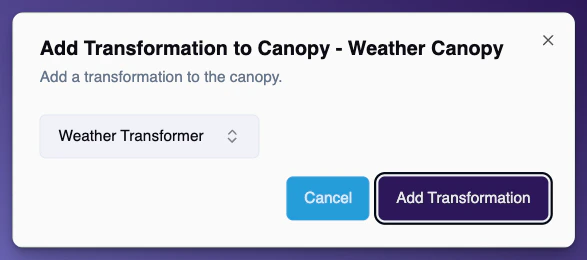
+ Transformation in the top right of the Canopy Transformations section.
Attach transformations to a Connector Instance
To attach a transformation to a Connector Instance, select the Connector Instance you want to add a transformation to. Navigate to the transformation tab, and similar to the Canopy Transformations section you’ll see dotted lines around the Transformation slots if there are no Transformations attached to the Connector Instance.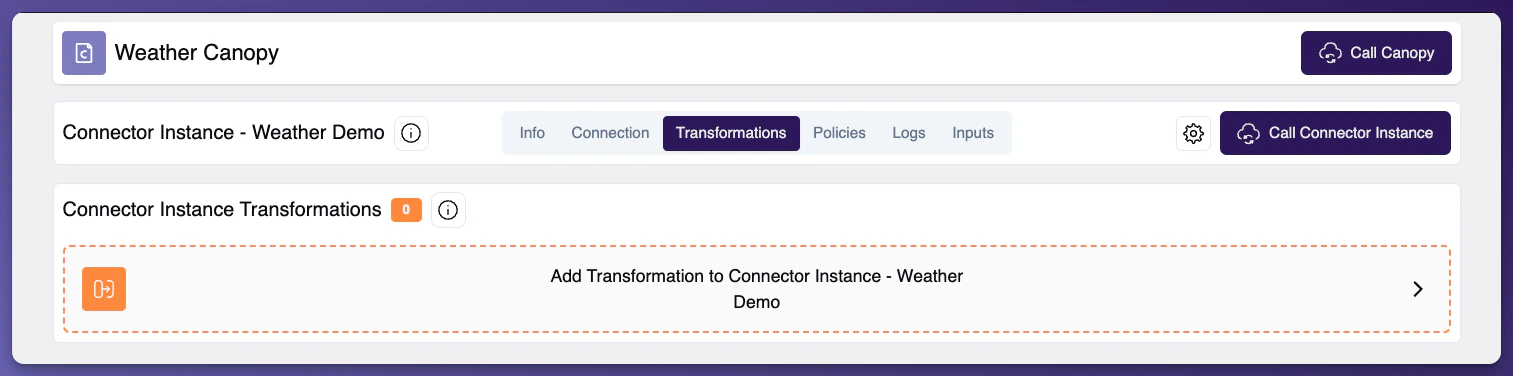
Preview your transformations by calling your canopy from the top right corner.
Note You can expand your connector transformations to preview each individual action.